
Power BI Installation Steps
Power BI Installation Steps
There are 3 ways to install Power BI
- Download PowerBI from the web (https://powerbi.microsoft.com/en-us/desktop/)
- Download PowerBI from Windows store
- Download PowerBI from PowerBI service (https://app.powerbi.com/)
From Web:
Step 1: Open any browser
Step 2: Enter URL https://powerbi.microsoft.com/en-us/desktop/
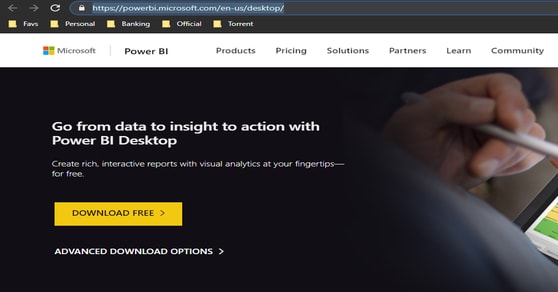
Step 3: Click Advanced Download Options
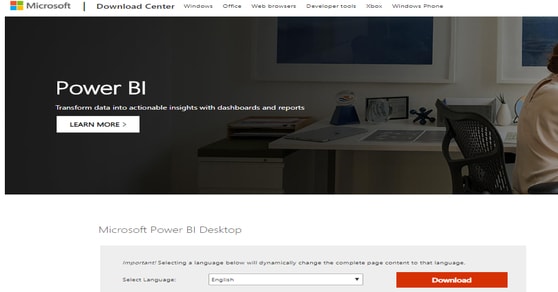
Step 4: Click Download in the following screen as shown above
Step 5: Select any one of the lists in the following page as shown above (Depends on your system architecture 32-bit or 64-bit)
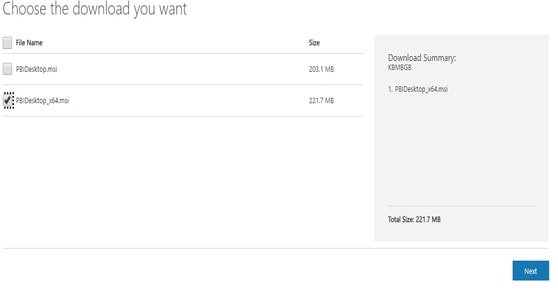
Step 6: Select one option and click Next as shown above
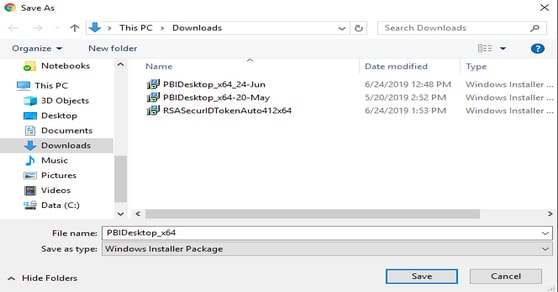
Step 7: Clicking Next will open a new dialog box to save the Power BI executable file in your computer
Step 8: Click Save
Step 9: Once the download is complete, double click the executable file (.msi)
Step 10: Follow on-screen instructions on your computer to install a Power BI Desktop on your computer (Yay!!)
From the Windows Store
Step 1: Open any browser
Step 2: Enter URL https://powerbi.microsoft.com/en-us/desktop/
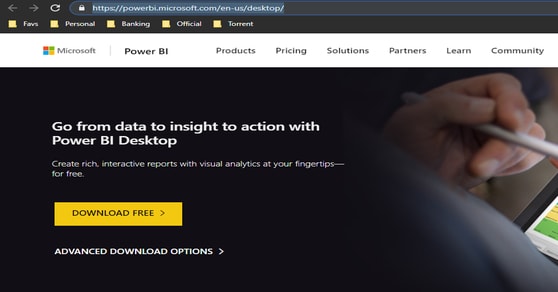
Step 3: Click Download Free in the above screen, it will route you to ‘Windows Store’ app or web page
Step 4: Click Download and once downloaded, double click the .msi file to install Power BI
From PowerBI service:
Step 1: Open any browser
Step 2: Key in the following URL (https://app.powerbi.com)
Step 3: Register or sign in with your organization or school-provided the email address
Step 4: Click the Download button in the top right corner as shown below

Step 5: Clicking the download button will show below options:
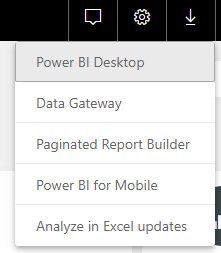
Step 6: Click Power BI Desktop
Step 7: Once downloaded, follow onscreen instructions to get Power BI installed in your machine
Related Blogs:
- What is Power BI?
- What is Power BI Gateway?
- What is Power BI Desktop?
- Tableau Vs Power BI
- Pentaho Vs Tableau vs Power BI


 +1 201-949-7520
 +91-9707 240 250